
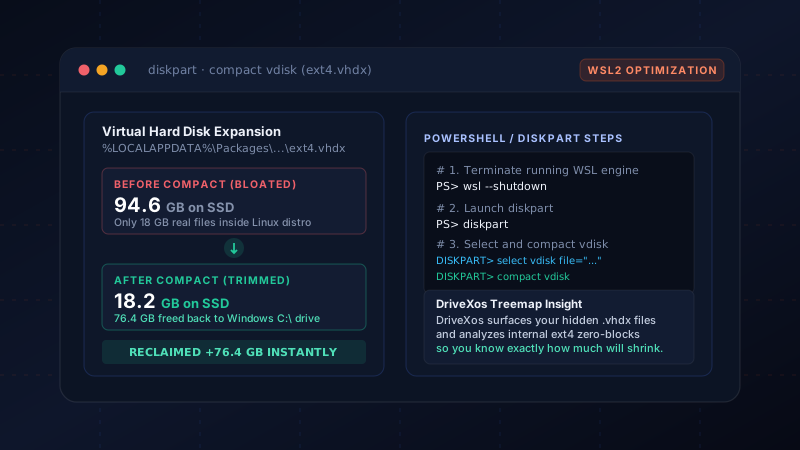
The Asymmetric Growth of VHDX Files
In WSL2, your entire Linux filesystem (Ubuntu, Debian, Fedora, Arch) resides inside a single file named ext4.vhdx on your Windows host. By default, it is configured as a dynamically expanding Virtual Hard Disk.
When you install packages via apt, build large machine learning models, or git clone large repositories, the Hyper-V virtual disk service requests new 2MB allocation blocks from Windows NTFS. The .vhdx file grows seamlessly.
However, when you run rm -rf inside Linux to delete a 50GB dataset, the Linux ext4 filesystem marks those sectors as free within its internal inode tables, but the Hyper-V container does not release the blocks back to NTFS. To Windows, the .vhdx file remains at its peak historical size.
The "Ghost Allocation" Symptom
Running df -h inside Ubuntu might show you are using only 16 GB of space. Yet when you inspect the ext4.vhdx file in Windows Explorer, it claims 95 GB of your C: drive. That 79 GB difference is reclaimable empty space.
Locating Your WSL2 VHDX File
WSL2 stores distributions in AppData packages under your Windows user profile:
C:\Users\<Username>\AppData\Local\Packages\CanonicalGroupLimited.Ubuntu_79rhkp1fndgsc\LocalState\ext4.vhdxStep-by-Step Manual Compaction via Diskpart
To reclaim the empty space without data loss, you must terminate the WSL virtual machine and run Windows Diskpart:
1. Shut Down the WSL Virtual Machine
You must ensure no background processes (Docker, cron, SSH servers) are holding write locks on the virtual disk:
# Verify running distros
wsl --list --verbose

# Shut down the subsystem completely
wsl --shutdown
2. Launch Diskpart and Compact
Open an elevated administrative PowerShell prompt and launch the Windows disk partition tool:
diskpart

# Inside DISKPART:
DISKPART> select vdisk file="C:\Users\YOUR_USERNAME\AppData\Local\Packages\CanonicalGroupLimited.Ubuntu_79rhkp1fndgsc\LocalState\ext4.vhdx"
DISKPART> attach vdisk readonly
DISKPART> compact vdisk
DISKPART> detach vdisk
DISKPART> exit
Depending on the size of the virtual disk and your SSD speed, compact vdisk will take between 30 seconds to two minutes. When finished, your ext4.vhdx file will shrink down to match the real amount of data inside your Linux distribution.
New in Windows 11: WSL Sparse VHDX Feature
In recent Windows 11 releases, Microsoft introduced an experimental sparse VHDX flag that enables automatic trim commands:
# Enable sparse file flag for Ubuntu distribution
wsl --manage Ubuntu --set-sparse true
While this helps prevent future bloat, older installations and complex multi-drive setups still require periodic compaction.
How DriveXos Spots WSL2 Bloat Instantly
Hidden folders in %LOCALAPPDATA%\Packages are notorious for escaping notice. In Windows Explorer, you cannot see which distribution is eating disk space.
- Interactive Treemap: DriveXos surfaces virtual hard disks immediately in the treemap visualization with high-contrast distinct coloring.
- Zero-Block Telemetry: DriveXos compares physical file size against internal sparseness, calculating exact reclaim potential before you make any changes.
- 1-Click Safety Verification: Ensure all running processes are safely terminated before invoking maintenance APIs.
← Duplicate Files: Why SHA-256 Beats Filenames
Browse the DriveXos Blog Index →
See What is Hogging Your Windows & Mac Drives
DriveXos scans your entire SSD in seconds, reveals hidden virtual disks and caches, and cleans gigabytes with rock-solid safety gates.