
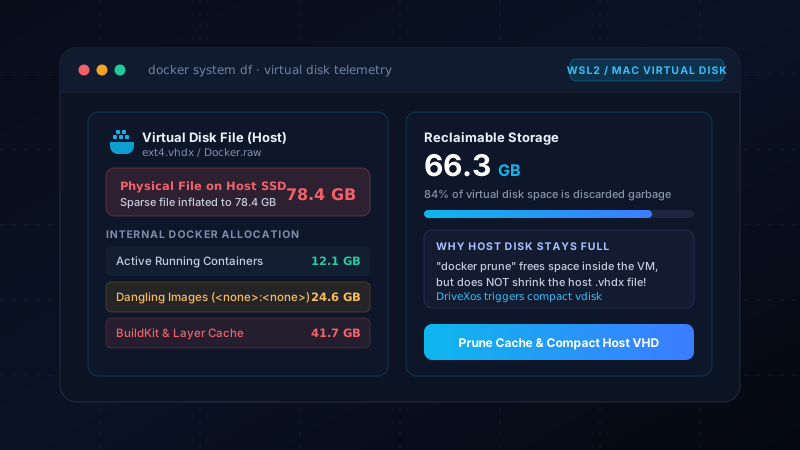
The Virtual Disk Reality
Neither Windows nor macOS can run Linux container kernels natively. To make Docker work, Docker Desktop runs a lightweight Linux virtual machine behind the scenes:
- On Windows: Docker runs inside a WSL2 VM named
docker-desktop-data, which stores all container files inside an ext4 virtual disk file:ext4.vhdx. - On macOS: Docker runs via the macOS Virtualization framework, storing data in a sparse raw disk image:
Docker.rawlocated in~/Library/Containers/com.docker.docker/Data/vms/0/data/.
The Dynamic Growth Trap
These virtual disk files are sparse dynamically expanding disks. When you pull a 5GB image or build a massive multi-stage Dockerfile, the host disk file grows immediately to accommodate the new bytes. However, when you delete those files inside the container, the host disk file never automatically shrinks.
Checking Your Real Container Footprint
To see the internal breakdown of what Docker is storing, run the built-in analyzer from your terminal:
docker system df -vThe output splits your consumption into four categories:
- Images: Base images (Ubuntu, Node, Python, Golang) plus untagged intermediate layers marked as
<none>:<none>. - Containers: The read-write layer created on top of images when containers run.
- Local Volumes: Persistent databases (PostgreSQL, Redis) and named caches.
- Build Cache: BuildKit cache snapshots that accelerate future builds. This is frequently the biggest culprit, often hoarding 30GB+ of forgotten build steps.
Step 1: Thorough Pruning from the Docker Engine
A basic docker system prune only removes stopped containers and untagged images. To clean BuildKit caches and unreferenced volumes, you need the aggressive flags:
# Prune stopped containers, all unused images, and build cache
docker system prune --all --volumes --force

# Explicitly purge the BuildKit layer cache
docker builder prune --all --force
Step 2: Shrinking the Virtual Disk on Host OS
Now that the internal space is freed, you must instruct the host operating system to release the zeroed blocks back to your physical SSD.
On macOS
Docker Desktop for Mac includes a built-in reclamation feature. Go to:
Docker Desktop Settings → Resources → Advanced → Virtual disk limit → Click "Clean / Purge data" or restart Docker Desktop to allow APFS TRIM to discard sparse blocks.
On Windows (WSL2 diskpart compact)
On Windows, WSL2 will not shrink the ext4.vhdx until you shut down the subsystem and run the native Windows disk partition utility:
# 1. Stop all WSL instances and Docker Desktop
wsl --shutdown

# 2. Start Diskpart
diskpart

# 3. Inside DISKPART prompt, target the Docker VHDX:
DISKPART> select vdisk file="C:\Users\YOUR_USERNAME\AppData\Local\Docker\wsl\data\ext4.vhdx"
DISKPART> attach vdisk readonly
DISKPART> compact vdisk
DISKPART> detach vdisk
DISKPART> exit
How DriveXos Makes This Effortless
Instead of remembering complex paths across %LOCALAPPDATA% and executing diskpart scripts with administrator rights, DriveXos handles the whole workflow visually:
- Treemap Visualization: Shows your virtual hard disks in proportional perspective against your physical drive capacity.
- Telemetry Breakdown: Identifies whether the virtual disk is bloated with reclaimable zero-blocks without needing you to boot into terminal commands.
- Safe Trim Automation: Reclaims storage safely with verified authorization gates.
← How node_modules Quietly Eats 50GB+ of Your SSD
See What is Really Inside Your Docker Disks
DriveXos scans your drives in seconds and pinpoints giant virtual disk files, build caches, and stale developer data with complete visual clarity.